The Ultimate LED Strip Lighting Guide
LED strip lights are one of the most flexible lighting solutions available for residential, commercial, architectural, retail, automotive, and decorative projects.
Their slim profile allows them to fit inside cabinets, shelves, ceiling coves, display cases, stairways, vehicles, signs, and other spaces where traditional lighting fixtures may be difficult to install. Most LED strips can also be cut at designated points, making it possible to adapt the lighting length to a specific project.
However, choosing an LED strip light involves more than selecting a color and connecting it to a power supply.
Voltage, brightness, LED density, color temperature, color rendering, environmental protection, strip length, power consumption, voltage drop, controller compatibility, mounting method, and heat dissipation can all affect the final result.
This guide explains how LED strip lights work, the different types available, how to compare their specifications, how to calculate the required power supply, and how to install and troubleshoot an LED strip lighting system.
What Are LED Strip Lights?
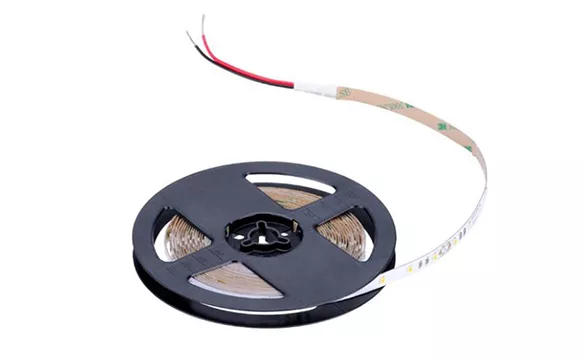
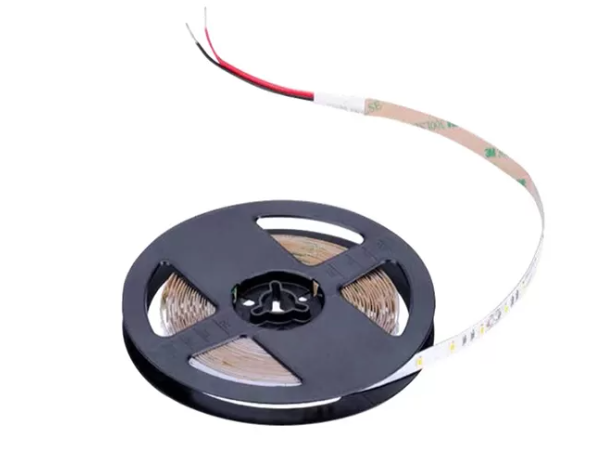
LED strip lights are narrow and flexible printed circuit boards fitted with multiple light-emitting diodes. They may also be called LED tape lights, flexible LED strips, LED ribbon lights, or LED light strips.
A typical LED strip contains:
◆ LED chips or LED packages
◆ A flexible printed circuit board
◆ Copper conductors
◆ Resistors or current-control components
◆ Soldering and connection pads
◆ Marked cutting points
◆ Adhesive backing
◆ Optional protective coatings or sleeves
The flexible circuit board allows the strip to follow straight surfaces, gentle curves, furniture edges, cabinet interiors, architectural coves, vehicle panels, and other irregular installation areas.
Most low-voltage LED strips can be shortened at marked cutting points. The unused section can often be connected and used in another part of the project, provided it has suitable copper contact pads.
Depending on the strip configuration and controller, LED strip lights can provide fixed white light, adjustable white light, single-color illumination, RGB color-changing effects, dedicated white and RGB lighting, or individually controlled animated effects.
LED Strip Lights vs. Rigid Linear Lights
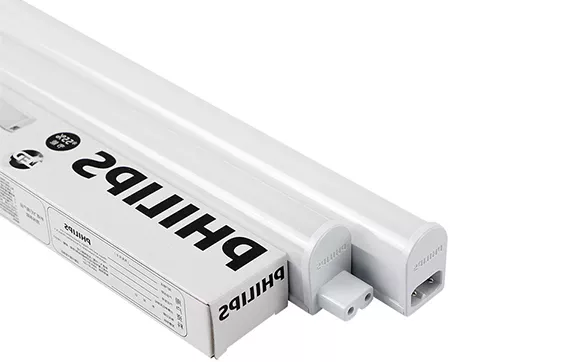
Flexible LED strips should not be confused with rigid LED light bars.
Flexible strips use a bendable circuit board and can usually be cut at marked intervals. They are suitable for custom-length projects, curved surfaces, concealed lighting, and installations with limited mounting space.
Rigid linear lights are installed inside a fixed aluminum or plastic housing. They generally have a predetermined length and cannot be bent or shortened in the same way as flexible LED tape.
| Flexible LED Strips | Rigid Linear Lights |
|---|
| Can normally be cut at marked points | Usually supplied in fixed lengths |
| Suitable for gentle curves | Designed mainly for straight installations |
| Easy to conceal | Often used as a finished visible fixture |
| Requires separate mounting accessories in some projects | Housing and diffuser are normally integrated |
| Suitable for custom installations | Suitable for standardized linear lighting |
Flexible strips are usually preferred for customized decorative and architectural lighting. Rigid light bars may be more appropriate when greater mechanical protection, a finished appearance, or simplified installation is required.
Common LED Strip Light Applications
LED strip lights may be used as decorative lighting, accent lighting, task lighting, display lighting, backlighting, or supplementary general illumination.
Indoor Applications
Common indoor uses include:
◆ Under-cabinet lighting
◆ Above-cabinet lighting
◆ Kitchen worktop lighting
◆ Wardrobe and closet lighting
◆ Pantry lighting
◆ Bookshelf lighting
◆ Ceiling cove lighting
◆ Stair and handrail lighting
◆ TV and monitor backlighting
◆ Display case lighting
◆ Retail shelf lighting
◆ Bar and restaurant lighting
◆ Hotel room lighting
◆ Office feature lighting
◆ Exhibition booth lighting
◆ Photography and video lighting
Outdoor and Mobile Applications
LED strips may also be used for:
◆ Deck and patio lighting
◆ Pergolas and gazebos
◆ Landscape accents
◆ Steps and walkways
◆ Building façades
◆ Outdoor signage
◆ Vehicle interiors
◆ Truck beds
◆ Recreational vehicles
◆ Boats and marine interiors
◆ Motorcycles
◆ Food trucks
◆ Mobile display equipment
The installation environment must be evaluated before selecting a strip. A basic indoor strip designed for a dry cabinet may fail when installed outdoors, near a sink, inside a vehicle, or in an area exposed to condensation.
Common LED Strip Lighting Problems
Many LED strip problems begin during product selection rather than during installation.
A strip may appear simple, but its electrical and environmental specifications must match the project. Selecting the wrong product can lead to uneven brightness, visible light points, inaccurate colors, flickering, overheating, failed adhesive, or premature damage.
Voltage Drop
Voltage drop is one of the most common LED strip lighting problems. It normally appears as a gradual reduction in brightness toward the end of a long strip.
On an RGB strip, voltage drop may also cause color changes because the red, green, and blue channels can respond differently when the available voltage decreases.
Insufficient Power
An undersized power supply may cause the strip to flicker, operate below full brightness, restart repeatedly, or become unstable when multiple colors are used at maximum output.
Visible LED Dots
When an LED strip is installed too close to a diffuser, wall, countertop, or reflective surface, the individual LED points may remain visible.
This can often be improved by using a higher-density strip, a deeper aluminum channel, a more diffusive cover, or a COB strip.
Poor Adhesion
Adhesive-backed LED strips may detach from dusty, oily, rough, painted, or high-temperature surfaces.
Cleaning the mounting area and adding mounting clips or an aluminum profile can improve long-term stability.
Incorrect Color Appearance
White LED strips may look different from nearby ceiling lights because of mismatched color temperatures. Low-quality white or RGB light may also make product colors, food, fabrics, wood, or skin tones appear unnatural.
Checking the color temperature and color rendering specifications before purchasing can prevent this problem.
How to Choose the Right LED Strip Light
Before comparing individual LED strip products, define the requirements of the project.
Consider the intended lighting function first. Decorative backlighting normally requires less brightness than under-cabinet task lighting. Retail displays, workstations, and commercial interiors may require higher output and more accurate color rendering.
The following factors should be confirmed before ordering:
| Selection Factor | Questions to Consider |
|---|
| Lighting purpose | Is the strip for decoration, accent lighting, task lighting, or general illumination? |
| Light color | Do you need fixed white, a single color, tunable white, RGB, RGBW, or addressable lighting? |
| Installation environment | Will the strip be used indoors, outdoors, near water, or in a dusty area? |
| Brightness | How many lumens per foot or meter are required? |
| Color temperature | Should the light appear warm, neutral, or cool? |
| Color rendering | Is accurate product, food, fabric, artwork, or skin-tone rendering important? |
| Total length | How many feet or meters of strip are required? |
| Maximum run | What is the longest continuous strip section powered from one point? |
| Control method | Is dimming, color adjustment, remote control, or smart control required? |
| Installation method | Will the strip use adhesive backing, clips, or an aluminum channel? |
| Power location | Where will the driver, controller, and connection wiring be installed? |
| Maintenance access | Can the power supply and connectors be accessed after installation? |
Planning these details in advance helps prevent compatibility and performance problems.
Types of LED Chips Used in Strip Lights
LED strip product names often include package numbers such as 2835, 3528, or 5050.
These numbers usually describe the approximate physical dimensions of the LED package.
| LED Package | Approximate Size | Common Uses |
|---|
| 2835 | 2.8 × 3.5 mm | White lighting, high-density strips, task lighting |
| 3528 | 3.5 × 2.8 mm | Decorative lighting, accent lighting, backlighting |
| 5050 | 5.0 × 5.0 mm | RGB strips, multi-color lighting, higher-output applications |
The LED package number does not independently determine brightness, efficiency, lifetime, or overall quality.
Two LED strips using the same package may have very different performance because of differences in operating current, LED binning, phosphor quality, circuit design, copper thickness, heat dissipation, and manufacturing consistency.
2835 LED Strips
The 2835 package is widely used in modern white LED strips. It can provide strong light output and good efficiency from a relatively compact package.
It is commonly selected for under-cabinet lighting, commercial shelving, architectural coves, retail displays, high-density strips, and high-CRI lighting.
3528 LED Strips
The 3528 package is frequently found in lower-output decorative and accent-lighting products.
It may be suitable for shelf accents, display borders, TV backlighting, decorative outlines, and applications where high brightness is unnecessary.
5050 LED Strips
The larger 5050 package can contain multiple LED dies. It is widely used for RGB, RGBW, and other multi-channel color-changing strips.
It may also be used for white and single-color lighting. However, package size alone should not be treated as proof of superior brightness.
When comparing LED strips, buyers should examine lumens, wattage, LED density, color quality, strip voltage, circuit-board design, and maximum run length.
SMD LED Strips vs. COB LED Strips
SMD and COB are two common LED strip construction methods.
SMD LED Strips
Surface-mounted device LED strips use clearly visible LED packages installed along the circuit board.
The distance between the LEDs is usually described as the LED pitch. A shorter pitch means the LEDs are positioned closer together.
SMD LED strips offer a wide range of brightness levels, voltages, colors, densities, widths, waterproofing options, and controller configurations. Their cutting points are generally easy to identify, and many solderless connectors are available.
The main visual disadvantage is that individual light points may remain visible when the strip is installed close to a diffuser or illuminated surface.
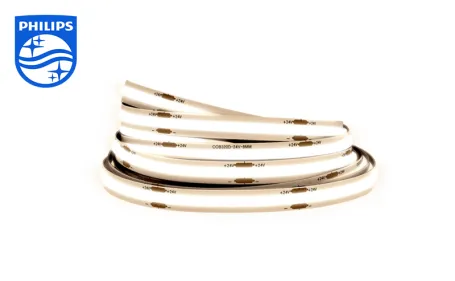
COB LED Strips
Chip-on-board strips use many small LED dies positioned closely together beneath a continuous phosphor layer.
This construction creates a smoother line of light and reduces visible spotting. COB strips are especially useful in shallow channels, reflective installations, display lighting, furniture lighting, and visible linear-lighting details.
| SMD LED Strips | COB LED Strips |
|---|
| Individual LED packages are visible | Light-emitting surface appears more continuous |
| Wide product and accessory selection | Smoother light with fewer visible dots |
| Suitable for many color configurations | Often selected for visible linear lighting |
| Easy-to-identify cutting points | Cutting intervals depend on circuit design |
| May show spotting in shallow profiles | Performs well in shallow channels |
COB strips should not be sharply folded or twisted. Connector compatibility and cutting intervals should also be checked before installation.
Static White LED Strips
A static white LED strip produces one fixed white color temperature.
Common options include:
◆ 2200K or 2400K extra warm white
◆ 2700K warm white
◆ 3000K warm white
◆ 3500K soft or neutral white
◆ 4000K neutral white
◆ 5000K daylight white
◆ 6000K or 6500K cool white
Static white strips are suitable when the lighting appearance does not need to change after installation.
They are commonly used in kitchens, cabinets, offices, shops, workstations, ceiling coves, display cases, shelves, and architectural details.
Because only one light channel is required, the wiring and control system are relatively simple. A compatible single-color dimmer can be added when brightness control is needed.
Single-Color LED Strips
Single-color strips produce one non-white color.
Available colors may include red, green, blue, amber, yellow, pink, violet, and orange.
These strips are commonly used for signage, entertainment spaces, decorative borders, stage environments, vehicles, equipment identification, themed displays, and architectural accents.
A single-color strip does not require an RGB controller. It normally uses a two-wire connection and can be paired with a compatible single-color dimmer.
Tunable White LED Strips
Tunable white LED strips contain warm-white and cool-white LEDs that can be controlled independently.
A compatible controller adjusts the balance between the two channels, allowing the user to change the appearance of the white light.
Depending on the strip, the adjustable range may extend from approximately 2700K warm white to 6500K cool white.
Warm settings create a softer and more relaxing atmosphere. Cooler settings provide a cleaner, brighter, and more energetic appearance.
Tunable white lighting is useful in:
◆ Hotels and hospitality spaces
◆ Bedrooms and living areas
◆ Offices and meeting rooms
◆ Retail stores
◆ Studios
◆ Multipurpose rooms
◆ Restaurants
◆ Residential interiors
The strip, controller, connector, and wiring must all support two independently controlled white channels. A standard two-wire single-color dimmer cannot provide tunable-white control.
Dim-to-Warm LED Strips
Dim-to-warm strips become warmer in appearance as their brightness is reduced.
This effect is designed to imitate traditional incandescent lighting, which shifts toward a warmer appearance when dimmed.
Dim-to-warm lighting is frequently used in restaurants, hotels, lounges, bedrooms, luxury residential interiors, and hospitality environments.
It is important to distinguish dim-to-warm from tunable white.
With tunable white lighting, brightness and color temperature may be adjusted separately. With dim-to-warm lighting, the color temperature automatically becomes warmer as the brightness decreases.
RGB LED Strips
RGB LED strips use red, green, and blue channels to create a wide range of mixed colors.
A compatible RGB controller can provide static colors, brightness adjustment, automatic color cycling, fading, flashing, music-responsive effects, and programmed scenes.
RGB strips can create an approximate white color by combining red, green, and blue light. However, the resulting white may not be as natural or practical as light from a dedicated white LED channel.
Standard RGB strips normally display the same color across the entire connected section. For individually controlled colors and moving effects, an addressable strip is required.
RGBW LED Strips
RGBW strips add a dedicated white channel to the red, green, and blue channels.
This gives the system two separate functions:
1. Decorative color-changing lighting from the RGB channels
2. More practical white illumination from the dedicated white channel
The white channel may be warm white, neutral white, or cool white, depending on the strip.
RGBW strips can also create softer pastel shades by mixing the white channel with RGB colors.
They require a compatible RGBW controller, five-conductor wiring in many configurations, and connectors that match the strip width and contact-pad layout.
RGB Plus Tunable White Strips
RGB plus tunable white strips combine red, green, and blue channels with separate warm-white and cool-white channels.
This allows one strip to provide full-color decorative effects, practical white illumination, and adjustable white color temperature.
These strips are suitable for multipurpose residential rooms, restaurants, bars, hotels, entertainment venues, retail spaces, and architectural installations.
Because they use more independent channels, they require matching multi-channel controllers, suitable wire, correctly aligned connectors, and sufficient controller output capacity.
Addressable and Color-Chasing LED Strips
Addressable strips are also known as digital LED strips, pixel strips, programmable strips, or color-chasing strips.
Unlike standard RGB strips, addressable products allow individual LEDs or small groups of LEDs to be controlled separately.
This makes it possible to create:
Addressable strips are commonly used for gaming rooms, stage decoration, entertainment venues, event displays, signs, light shows, and creative architectural projects.
The strip must be paired with a controller that supports its specific data protocol.
Before installation, confirm:
◆ Strip operating voltage
◆ Data signal type
◆ Signal direction
◆ Pixel or LED control grouping
◆ Connector layout
◆ Maximum number of supported pixels
◆ Data amplification requirements
◆ Power-injection requirements
Connecting an incompatible controller may prevent the strip from operating correctly.
Indoor, Weather-Resistant, and Waterproof LED Strips
LED strips are available with different levels of protection against dust, moisture, splashing water, and immersion.
Protection is normally described using an IP rating. The first number indicates protection against solid objects and dust, while the second indicates protection against moisture.
| Typical Protection Level | General Application |
|---|
| Low-IP indoor strip | Dry cabinets, shelves, bedrooms, offices, ceiling coves |
| Coated or splash-resistant strip | Kitchens, bathrooms outside wet zones, covered outdoor spaces |
| Weather-resistant strip | Patios, decks, vehicles, signage, protected landscape installations |
| Waterproof strip | Areas exposed to water, heavy moisture, or frequent cleaning |
| Submersible-rated product | Applications specifically approved for continuous immersion |
An IP rating should not be interpreted in isolation. A waterproof strip may still fail if its cut ends, connectors, power wires, or soldered joints are not sealed correctly.
Cutting a waterproof strip exposes its internal conductors. The cut end must be resealed with compatible end caps, silicone, heat-shrink tubing, or another approved method.
For underwater applications, only products specifically designed and approved for continuous immersion should be used. The power supply, controller, and electrical connections must also be installed in a safe location according to applicable electrical requirements.
LED Density and Light Uniformity
LED density describes the number of LEDs installed within a specified strip length.
It is usually expressed as LEDs per meter or LEDs per foot.
A low-density strip has greater spacing between individual LED packages. It may consume less power and work well for decorative accents where the strip is hidden far from the illuminated surface.
A medium-density strip provides a balance between brightness, cost, and light uniformity. It is commonly used for cabinets, shelves, coves, displays, and general accent lighting.
A high-density strip contains more LEDs over the same length. It normally creates a smoother line of light and may provide higher output.
| LED Density | Typical Characteristics |
|---|
| Low density | Lower cost and power consumption, but more visible light points |
| Medium density | Balanced brightness and uniformity |
| High density | Smoother light line and reduced spotting |
| COB construction | Near-continuous light appearance |
LED density alone does not determine total brightness. The operating wattage and output of each LED must also be considered.
A high-density strip running at low power may produce less light than a lower-density strip designed for higher output.
How to Reduce Visible LED Dots
Visible light dots are common when an SMD strip is installed too close to a diffuser, wall, countertop, or reflective surface.
Several methods can improve uniformity:
◆ Select a strip with higher LED density
◆ Use a COB LED strip
◆ Increase the distance between the strip and diffuser
◆ Choose a deeper aluminum channel
◆ Use a more diffusive channel cover
◆ Increase the distance between the strip and illuminated surface
◆ Install the strip so the light reflects indirectly rather than facing the viewer
A diffuser can reduce visible spotting, but it may also reduce total light output. The strip density, channel depth, diffuser transmission, and viewing distance should therefore be evaluated together.
LED Strip Brightness
LED strip brightness is usually measured in lumens per foot or lumens per meter.
The required brightness depends on the lighting function.
| Application | General Brightness Requirement |
|---|
| Decorative backlighting | Low output may be sufficient |
| Shelf and display accents | Low to medium output |
| Ceiling cove lighting | Medium output, depending on room size |
| Under-cabinet task lighting | Medium to high output |
| Retail and commercial displays | Medium to high output |
| Workstations and functional areas | Higher output may be necessary |
Brightness should not be estimated only from the LED package size or number of LEDs.
Compare the following specifications:
The same strip may appear brighter when installed in a reflective aluminum channel than when mounted on a dark, light-absorbing surface.
Power Consumption and Efficiency
LED strip power consumption is commonly stated in watts per foot or watts per meter.
Higher wattage often produces more light, but it also creates more heat and requires a larger power supply.
Luminous efficacy describes how efficiently the strip converts electrical power into visible light. It is usually measured in lumens per watt.
A higher-efficacy strip can produce more light while consuming less electricity. However, efficacy should be considered together with color quality, brightness, and thermal performance.
High-output LED strips should normally be mounted in an aluminum channel or on another heat-dissipating surface. Installing a powerful strip on an insulating material may trap heat and reduce operating life.
CRI and Color Rendering Quality
Color Rendering Index, or CRI, describes how accurately a light source reveals the colors of objects compared with a reference light source.
The scale is generally expressed from 0 to 100. A value closer to 100 indicates better overall color rendering.
| CRI Level | General Use |
|---|
| Below 80 | Basic decorative or non-critical lighting |
| 80+ | General residential and commercial lighting |
| 90+ | Retail, kitchens, hospitality, artwork, and product displays |
| 95+ | Photography, premium retail, studios, and color-critical environments |
High-CRI strips are especially valuable in clothing stores, supermarkets, food displays, jewelry cases, galleries, museums, kitchens, salons, furniture displays, and other areas where colors and surface finishes should appear natural.
The general CRI value does not describe every part of the visible color spectrum. Projects involving red food, skin tones, artwork, wood, fabrics, cosmetics, or photography may also need information about individual color-rendering values, such as the rendering of saturated red.
TLCI for Photography and Video
TLCI stands for Television Lighting Consistency Index.
It evaluates how accurately colors are likely to be reproduced by cameras under an artificial light source.
TLCI is particularly relevant for:
A strip that appears acceptable to the human eye may still produce unnatural skin tones or difficult color correction on camera.
For photography and video projects, TLCI, CRI, color consistency, and flicker performance should all be evaluated.
Choosing the Right Color Temperature
Correlated Color Temperature describes the appearance of white light and is measured in Kelvin.
Lower Kelvin values appear warmer and more yellow or amber. Higher values appear cooler and more blue or daylight-like.
| Color Temperature | Appearance | Common Applications |
|---|
| 2000K–2700K | Extra warm, amber-toned | Restaurants, hotels, bedrooms, decorative lighting |
| 2700K–3000K | Warm white | Homes, lounges, cabinetry, hospitality |
| 3500K–4000K | Neutral white | Kitchens, offices, retail stores, multipurpose spaces |
| 4500K–5000K | Cool-neutral or daylight | Work areas, commercial displays, workshops |
| 5500K–6500K | Cool daylight | Garages, laboratories, task-focused spaces |
Warm white light creates a softer and more relaxing atmosphere. It is commonly used in bedrooms, lounges, restaurants, hotels, and residential spaces.
Neutral white provides a balanced appearance and works well in kitchens, offices, retail environments, cabinets, and multipurpose areas.
Cool white offers higher visual contrast and a cleaner appearance. It may be appropriate for workshops, garages, laboratories, commercial displays, and functional task lighting.
Nearby light sources should also be considered. Installing cool-white LED strips under cabinets while using very warm ceiling lights can create an obvious mismatch.
Wall finishes, wood tones, countertop colors, furniture, and the intended atmosphere can all influence the most suitable color temperature.
Measuring the Required LED Strip Length
Measure every area where the strip will be installed before purchasing the lighting system.
Include:
◆ Straight installation sections
◆ Corners
◆ Gaps between cabinets or shelves
◆ Connection wire
◆ Routing around obstacles
◆ Distance to the controller and power supply
LED strips are usually supplied in standard reel lengths. Some products may also be available in shorter sections or custom lengths.
After calculating the total quantity, determine the length of each continuous powered section.
The total installation length and maximum run length are not the same.
For example, a project may use 30 meters of LED strip in total while dividing it into six separate 5-meter runs connected in parallel.
Understanding Maximum Run Length
Maximum run length is the longest strip section that can normally be powered from one point without unacceptable voltage drop or conductor heating.
The maximum run depends on:
◆ Strip operating voltage
◆ Watts per foot or meter
◆ Circuit-board copper thickness
◆ LED density
◆ Conductor resistance
◆ Operating current
◆ Product design
The specified maximum run should not be exceeded simply because the power supply has enough total wattage.
Power supply capacity and strip maximum run length are separate limitations.
A power supply may be large enough to operate 20 meters of strip, while the strip itself may allow only 5 meters to be connected in one continuous run. In that case, the 20 meters should be divided into multiple shorter parallel sections.
What Is Voltage Drop?
Voltage drop occurs when electrical resistance causes the available voltage to decrease as current travels through the strip conductors or connecting wires.
In a long strip powered from one end, the LEDs near the power connection may appear brighter than the LEDs at the far end.
On white strips, the end may simply look dimmer. On RGB strips, the color may shift because the individual channels can respond differently to reduced voltage.
Voltage drop is affected by:
How to Reduce Voltage Drop
Long installations should be divided into shorter powered sections.
Instead of connecting every strip end to end, each section can be wired directly back to the controller or power supply.
Power injection may also be added at the far end or at intermediate points.
Common Wiring Methods
Single-end power
Power is supplied from one end of the strip. This is normally suitable for shorter runs within the product’s specified maximum length.
Dual-end power
Power is supplied at both ends of the strip. This can reduce brightness differences, provided the wiring arrangement is suitable for the system.
Center power
Power is connected near the middle of the strip, allowing current to travel in two directions.
Parallel wiring
Several shorter strip sections are connected independently to the same suitable power source or controller. This is often the preferred method for larger installations.
A heavier-gauge main cable may be routed along the project, with shorter branch wires supplying individual strip sections.
Signal amplifiers or repeaters may be needed when a large lighting load exceeds the controller output. However, an amplifier does not replace a correctly sized power supply or suitable wiring.
Choosing Between 5V, 12V, 24V, and Higher Voltages
LED strip lights are available in several operating voltages, including 5V, 12V, 24V, 36V, 48V, and line-voltage versions.
The power supply output voltage must match the strip voltage.
A 12V strip must be connected to a regulated 12V supply. A 24V strip requires a regulated 24V supply.
Applying excessive voltage can permanently damage the strip. Insufficient voltage may cause reduced brightness, color problems, or unstable operation.
5V LED Strips
Five-volt strips are commonly used for USB-powered lighting, short addressable strips, small decorative projects, computer lighting, and portable applications.
Because 5V systems draw relatively high current for a given power level, voltage drop can become significant over longer distances. Additional power-injection points are often necessary.
12V LED Strips
Twelve-volt strips are widely used in vehicles, boats, cabinets, signs, and small to medium installations.
They may have shorter cutting intervals than comparable 24V strips, making them useful when more precise length adjustment is required.
24V LED Strips
Twenty-four-volt strips are commonly selected for residential, architectural, retail, hospitality, and commercial installations.
For the same wattage, a 24V strip draws approximately half the current of a 12V strip. This can reduce voltage drop and allow longer continuous runs.
Higher-Voltage LED Strips
Thirty-six-volt and 48V strips may be used for longer architectural installations. They require matching power supplies, controllers, connectors, and accessories.
Line-voltage strips may support very long runs but must be installed according to stricter electrical-safety requirements. They should not be handled in the same way as standard low-voltage LED tape.
How to Calculate the Required Power Supply
A low-voltage LED strip requires a compatible power supply, also called an LED driver or transformer.
The output voltage must match the strip voltage, and the wattage rating must be greater than the total connected load.
Use the following calculation:
Total strip wattage = Strip length × Wattage per foot or meter
A safety margin should then be added so that the power supply does not operate continuously at its maximum rating.
A commonly used calculation is:
Recommended power supply wattage = Total strip wattage ÷ 0.80
Calculation Example
Suppose a project uses 20 feet of LED strip rated at 4 watts per foot.
20 feet × 4 watts = 80 watts
Add a 20% operating margin:
80 watts ÷ 0.80 = 100 watts
The project therefore requires a power supply rated for at least 100 watts.
When an exact size is unavailable, select the next standard power rating above the calculated requirement.
Choosing the Right Power Supply Type
Power supplies are available in several configurations.
| Power Supply Type | Typical Application |
|---|
| Plug-in adapter | Small indoor DIY projects |
| Desktop power supply | Cabinets, signs, displays |
| Enclosed hardwired driver | Permanent indoor installations |
| Waterproof driver | Outdoor or damp-location installations |
| Dimmable driver | Systems controlled by a compatible wall dimmer |
| Multi-output power supply | Larger projects with several lighting sections |
The power supply must be installed in a location with sufficient ventilation and maintenance access.
A waterproof strip does not make an indoor power supply suitable for outdoor use. Every component must be rated for its installation environment.
Controllers and Dimmers
The controller must match the LED strip type.
| Strip Type | Required Control |
|---|
| Fixed white or single color | Single-color dimmer |
| Tunable white | Two-channel tunable-white controller |
| RGB | RGB controller |
| RGBW | RGBW controller |
| RGB plus tunable white | Compatible multi-channel controller |
| Addressable strip | Protocol-compatible digital controller |
Depending on the system, a controller may adjust brightness, color, white color temperature, transition speed, scene selection, effect direction, and automatic lighting patterns.
Control options may include wall panels, handheld remotes, mobile applications, Wi-Fi, Bluetooth, voice-control platforms, and building automation systems.
The controller’s current and wattage ratings must be sufficient for the connected strip load.
When the installation exceeds the controller capacity, it may be necessary to use additional control zones, signal amplifiers, or separate controlled power circuits.
Choosing the Correct Connection Wire
The number of conductors must match the strip configuration.
| LED Strip Type | Common Wire Requirement |
|---|
| Single-color strip | 2 conductors |
| Tunable-white strip | Common connection plus two white channels |
| RGB strip | Common connection plus red, green, and blue |
| RGBW strip | Common connection plus RGB and white |
| RGB plus tunable white | Multiple conductors for RGB, warm white, and cool white |
| Addressable strip | Power, ground, and one or more data connections |
Wire gauge should be selected according to operating voltage, current, cable length, and allowable voltage drop.
Long cable runs or high-current installations require heavier-gauge wire.
LED Strip Installation Accessories
A complete LED strip system may require more than the strip, controller, and power supply.
Useful accessories include:
◆ Solderless strip connectors
◆ Strip-to-wire connectors
◆ Jumper cables
◆ Corner connectors
◆ Splitter cables
◆ Additional connection wire
◆ Mounting clips
◆ Aluminum channels
◆ Diffusers
◆ End caps
◆ Heat-shrink tubing
◆ Silicone sealant
◆ Waterproof connectors
◆ Junction boxes
◆ Cable-management accessories
Every accessory should match the strip width, conductor count, voltage, current, and environmental rating.
A connector designed for a 10 mm single-color strip may not fit a 10 mm RGB strip because the number and position of the copper pads are different.
How to Mount LED Strip Lights
The most common mounting methods are adhesive backing, mounting clips, and aluminum channels.
Adhesive-Backed Installation
Many LED strips include peel-and-stick adhesive on the rear surface.
Before installation, the mounting area should be clean, dry, smooth, and free from dust, oil, grease, and loose material.
Clean the surface with a suitable cleaner and allow it to dry completely.
Remove the protective liner gradually while pressing the strip into position. Avoid removing the entire liner at once because the strip may attach in the wrong location or collect dust before installation is complete.
Adhesive backing may not hold reliably on rough wood, brick, textured paint, dusty surfaces, low-surface-energy plastics, or areas exposed to high temperature.
Mounting Clips
Mounting clips provide mechanical support and are useful when the strip is installed vertically, upside down, outdoors, in vehicles, or in locations exposed to vibration.
The clips should secure the circuit board without crushing the LEDs or damaging the protective coating.
Aluminum Channels
Aluminum channels provide a more finished appearance and can improve strip protection, mounting stability, light distribution, and heat dissipation.
Common profile types include:
A diffuser can soften the light and reduce visible LED points. However, it may also reduce the total output, so diffuser transmission should be considered when calculating brightness.
Heat Management
LED strip lights produce less radiant heat than many traditional lighting sources, but they still generate heat at the circuit board.
Heat must be transferred away from the LEDs to maintain output and operating life.
High-output strips should normally be mounted on aluminum channels or another suitable heat-dissipating surface.
Avoid installing high-wattage strips:
◆ Inside tightly enclosed spaces without airflow
◆ On insulating foam
◆ On fabrics
◆ On heat-sensitive plastic
◆ In overlapping or coiled arrangements
◆ Inside an unreleased reel while operating
Never operate a high-output strip while it remains tightly wound on the reel. Heat can accumulate rapidly and damage the LEDs or circuit board.
How to Connect Multiple LED Strip Sections
Solderless connectors provide a convenient way to join strip sections without soldering.
Clamp-style connectors attach directly to the copper pads. Jumper connectors include a length of wire for bridging gaps or moving around corners.
Before choosing a connector, confirm:
◆ Strip width
◆ Number of copper pads
◆ Pad spacing
◆ Strip type
◆ Waterproof coating
◆ Maximum current
◆ Connector dimensions
Align every connection carefully. Positive, negative, and individual control channels must match.
Reversed polarity may prevent the strip from operating. Incorrect RGB channel alignment may cause the selected controller colors to appear incorrectly.
Multiple strips may be connected end to end only when the combined length remains within the specified maximum run and controller capacity.
For longer installations, parallel wiring is generally more reliable.
How to Solder LED Strip Lights
Disconnect all power before cutting, soldering, or modifying an LED strip.
Required tools may include:
Soldering Procedure
1. Confirm that the wire has the correct number of conductors for the LED strip.
2. Cut the strip only at a marked cutting point. Make sure usable copper pads remain on the section being connected.
3. Strip a small amount of insulation from each wire.
4. Pre-tin the exposed wire conductors by applying a small amount of solder.
5. Apply a small amount of solder to the LED strip’s copper pads.
6. Position each wire on the corresponding pad.
7. Briefly heat the joint until the solder bonds. Do not hold the soldering iron on the circuit board for too long.
8. Allow the connection to cool.
9. Check that no solder bridge connects adjacent pads.
10. Insulate the connection using heat-shrink tubing, silicone, or another appropriate protective method.
Waterproof LED strips must be resealed after soldering if their original environmental protection is to be maintained.
Installing LED Strips Around Corners
LED strips can be installed around corners, but they should not be forced into sharp bends.
A short length of wire may be soldered between two cut sections, creating a flexible connection around the corner.
Compatible solderless corner connectors may also be used.
Some strips can be folded carefully, but a sharp fold may crack the copper conductors, damage the LEDs, separate the adhesive, or split the protective coating.
Avoid twisting the strip or bending it sideways unless the product is specifically designed for that direction of movement.
For a clean 90-degree corner, cutting the strip at a marked point and reconnecting the two sections is normally safer than forcing the circuit board into a sharp bend.
How to Cut LED Strip Lights
Most flexible LED strips can be cut, but only at designated cutting marks.
The cutting interval depends on strip voltage and circuit design.
Before cutting:
1. Measure the required installation length.
2. Locate the nearest cutting mark.
3. Confirm that the cutting point contains usable copper pads.
4. Disconnect the strip from power.
5. Cut straight through the marked line with sharp scissors.
Cutting between marked points may damage an electrical circuit and prevent part of the strip from working.
SMD strips, COB strips, flexible neon strips, and waterproof strips may all use different cutting intervals.
After cutting a waterproof strip, reseal the exposed end using compatible end caps, silicone, or another approved sealing method.
Testing Before Final Installation
The complete LED strip system should be tested before the strip is permanently mounted.
Connect the power supply, controller, and strip temporarily. Confirm that:
◆ Every section lights correctly
◆ Dimming works smoothly
◆ RGB colors correspond to the controller
◆ Tunable-white channels operate correctly
◆ Addressable effects move in the expected direction
◆ The power supply does not overheat
◆ The controller is not overloaded
◆ There is no visible flickering
◆ Voltage drop is acceptable
◆ All connectors remain secure
Testing before installation makes it easier to correct reversed wiring, poor solder joints, incompatible connectors, and controller problems.
Common LED Strip Troubleshooting
The Entire Strip Does Not Turn On
Check the power source, power supply input, driver output voltage, controller wiring, polarity, and strip connections.
Confirm that the power supply voltage matches the strip voltage.
A reversed positive and negative connection may prevent a single-color strip from operating.
Only Part of the Strip Works
A damaged circuit section, incorrect cut, loose connector, failed solder joint, or broken copper conductor may interrupt power.
Inspect the first non-working section and the connection immediately before it.
The End of the Strip Is Dim
This usually indicates voltage drop.
Shorten the continuous run, add power injection, use heavier wire, or divide the project into parallel sections.
The Strip Flickers
Possible causes include:
◆ Undersized power supply
◆ Incompatible dimmer or driver
◆ Loose connection
◆ Controller overload
◆ Poor-quality power output
◆ Excessive voltage drop
◆ Damaged strip section
◆ Unstable data signal on an addressable strip
RGB Colors Are Incorrect
Check the channel order at every connector.
Some RGB strips use different pad sequences. The controller output must match the strip’s positive connection and red, green, and blue channels.
The Strip Becomes Too Hot
Check whether the strip is operating above its rated voltage, mounted on an insulating surface, overlapped, enclosed without ventilation, or operated while still coiled.
High-output strips should be mounted to a suitable heat-dissipating profile.
The Adhesive Does Not Hold
Clean the surface and remove dust, oil, and moisture.
Use mounting clips, aluminum profiles, or a suitable additional adhesive when the mounting surface is rough, textured, curved, or exposed to heat.
Waterproof Strip Fails After Cutting
The cut end may not have been resealed correctly.
Moisture can enter through exposed copper pads, connectors, or poorly protected solder joints. All modified sections must be sealed according to the environmental requirements.
Application-Based LED Strip Selection
Under-Cabinet Lighting
Under-cabinet lighting normally benefits from a fixed-white or tunable-white strip with medium to high brightness and good color rendering.
A color temperature between approximately 3000K and 4000K is commonly selected for kitchens.
An aluminum channel with a diffuser can protect the strip and create a more uniform line of light.
Ceiling Cove Lighting
Cove lighting often uses medium- or high-output strips because the light must reflect from the ceiling or wall before entering the room.
Twenty-four-volt strips are frequently preferred for longer runs. The distance between the strip and reflective surface should be sufficient to avoid visible bright spots.
Retail Display Lighting
Retail displays require careful consideration of brightness, color temperature, and color rendering.
High-CRI strips can help clothing, food, cosmetics, furniture, jewelry, and other products appear more natural.
The color temperature should match the product type and surrounding store lighting.
TV and Monitor Backlighting
Lower-output white or RGB strips are usually sufficient for TV and monitor backlighting.
The strip should be positioned so that the LEDs face the wall rather than the viewer. This creates indirect illumination and reduces glare.
Outdoor Lighting
Outdoor LED strips must have suitable moisture protection. Connections, cut ends, controllers, and power supplies must also be protected.
Mounting clips are often more reliable than adhesive alone in outdoor environments.
Vehicle and Marine Lighting
Confirm the electrical system voltage before selecting the strip.
Vehicles commonly use nominal 12V or 24V electrical systems, but actual voltage may fluctuate while the engine is running. Appropriate voltage regulation or automotive-rated products may be required.
Marine environments may require additional resistance to water, salt, corrosion, and vibration.
Photography and Video Lighting
Select strips with high CRI, high TLCI, consistent color temperature, and low flicker.
The strip should also be compatible with the intended dimming method and camera frame rates.
Final LED Strip Selection Checklist
Before purchasing or installing an LED strip lighting system, confirm the following:
◆ Lighting purpose
◆ Required color or white color temperature
◆ Brightness per foot or meter
◆ LED density
◆ SMD or COB construction
◆ CRI and TLCI requirements
◆ Indoor or outdoor protection rating
◆ Strip operating voltage
◆ Total strip length
◆ Maximum continuous run
◆ Wattage per foot or meter
◆ Required power supply capacity
◆ Controller type and output rating
◆ Connection-wire conductor count
◆ Wire gauge
◆ Connector compatibility
◆ Mounting method
◆ Heat-dissipation requirements
◆ Corner connection method
◆ Dimming or smart-control compatibility
◆ Access for future maintenance
A reliable LED strip installation depends on every component working together.
The strip, power supply, controller, wire, connectors, mounting accessories, and environmental protection should all match the same application.
By planning the electrical load, continuous run length, light output, color quality, installation environment, and control method in advance, LED strip lights can provide efficient, uniform, and flexible illumination for cabinets, displays, architectural features, commercial interiors, outdoor spaces, vehicles, signs, and many other projects.